GET 20% OFF
By subscribing to our newsletter
3 Cold Brewing Methods Using ARAKU Coffee
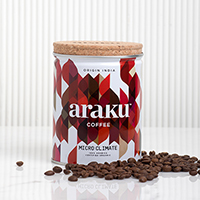
If you crave a good iced coffee all year round, but loathe the way so many end up tasting watery or overly bitter, then there’s only one solution: the ARAKU Cold Brew. With its generous body and wholesome notes of almost candied fruit and a hint of elegant bitterness in its finish, Araku Micro Climate is the perfect coffee to prepare a delicious cold brew.
Here are 3 methods that guarantee a smooth & icy cup, every single time. If you ask us, it’s the coolest way to spend the summer & monsoon!
1. HARIO COLD BREW BOTTLE
Say hello to summer in a bottle! Hario’s Cold Brew Bottle is convenient and chic - ideal for those who want to get things done quickly and enjoy their caffeine fix on-the-go. Order this from our website and make your own cold brew like a pro.
1. Scoop out 8 levelled tbsp (55g) of ARAKU Micro Climate - Coarse Grind.
2. Remove the filter from the spouted top of the bottle and add the coffee in the bottom compartment. Then, reattach the top portion of the filter.
3. Twist the filter into the top of the bottle and attach the filter & the top of the bottle to the glass bottle base.
4. Remove the spout and pour water into the bottle until the top square mark (650 ml) and shake gently.
5. Keep it in the fridge for 12-15 hours. (We like chilling it overnight, so we can wake up to a ready-to-drink bottle of cold brew!)
6. Once it’s brewed, gently shake the bottle again. Then remove the filter, place the top of the bottle back onto the glass base, and open the spout.
7. Pour it into a tall glass and top it off with lots of ice! Your cold brew is ready to drink.
2. MASON JAR
Don’t have any coffee equipment at home? We’ve got you. All you need for this method is a Mason Jar and ARAKU Micro Climate, of course. Super easy. Super delicious.
1. Take 1 cup of ARAKU Micro Climate - Coarse Grind and 2 cups of filtered water. Note: The coffee to water ratio should always be 1:2.
2. Add the coffee into a clean mason jar.
3. Add filtered water and stir to make sure that all coffee grounds are wet.
4. Cover with a double-layer cheesecloth and keep it in the fridge for 12-15 hours. (Let it brew while you sleep at night, or while you try not to sleep during your work-from-home day).
5. Once that’s done, straina the cold brew concentrate through a double-layer cheesecloth into a clean container.
6. You can put the concentrated brew back into a clean mason jar and store it in the fridge for upto 2 weeks.
7. If you don’t like it black, add a little water to dilute the taste or even a splash of soy or coconut or almond milk.
3. FRENCH PRESS
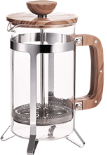
If you already have a French press at home, you can use that to make your own cold brew! The best part? The concentrate can be stored in the fridge for upto 2 weeks. Yup, brew once, drink whenever.
1. For a 8 cup French press, add in 100g of ARAKU Micro Climate - Coarse Grind.
2. Slowly add 650 ml filtered water and gently stir to make sure that all coffee grounds are wet.
3. Place the lid on the French press to cover, but don’t press it.
4. Keep it in the fridge for 12-15 hours. (Overnight, or during the day while you finish all your errands. You’ll have a refreshing cold brew waiting for you right after.)
5. Once that’s done, plunge and then strain the brewed concentrate through a paper filter, and pour into a clean serving vessel.
6. If you don’t like it black, add a little water to dilute the taste or you can even add a splash of your favourite milk/ dairy alternative for a customised cold latte. Cheers!
The best part about making cold brew at home is that you can customise it just the way you like. Choose whatever brewing method works best for you. Drink it on the rocks or add water, milk, ice cream, soda...the options are endless! Plus, you’re your own barista now and that definitely calls for some serious bragging rights.
To order your ARAKU Micro Climate Coffee for Cold Brew, click here and share your brewing experience with us @arakucoffeein

